Set up single sign-on
Let your team sign in with their work account through Microsoft Entra ID, OneLogin, Duo, Google Workspace, Okta or any OpenID Connect or SAML 2.0 identity provider.
Who can do this:Tenant Administrator
With single sign-on, people sign in to OGDESK through your organisation’s own identity provider, with the account they already use at work. OGDESK never sees their password. It works on every plan.
Using Microsoft Entra ID, OneLogin or Duo? Follow the guide for your provider instead. Each walks through both sides step by step, with its own video.
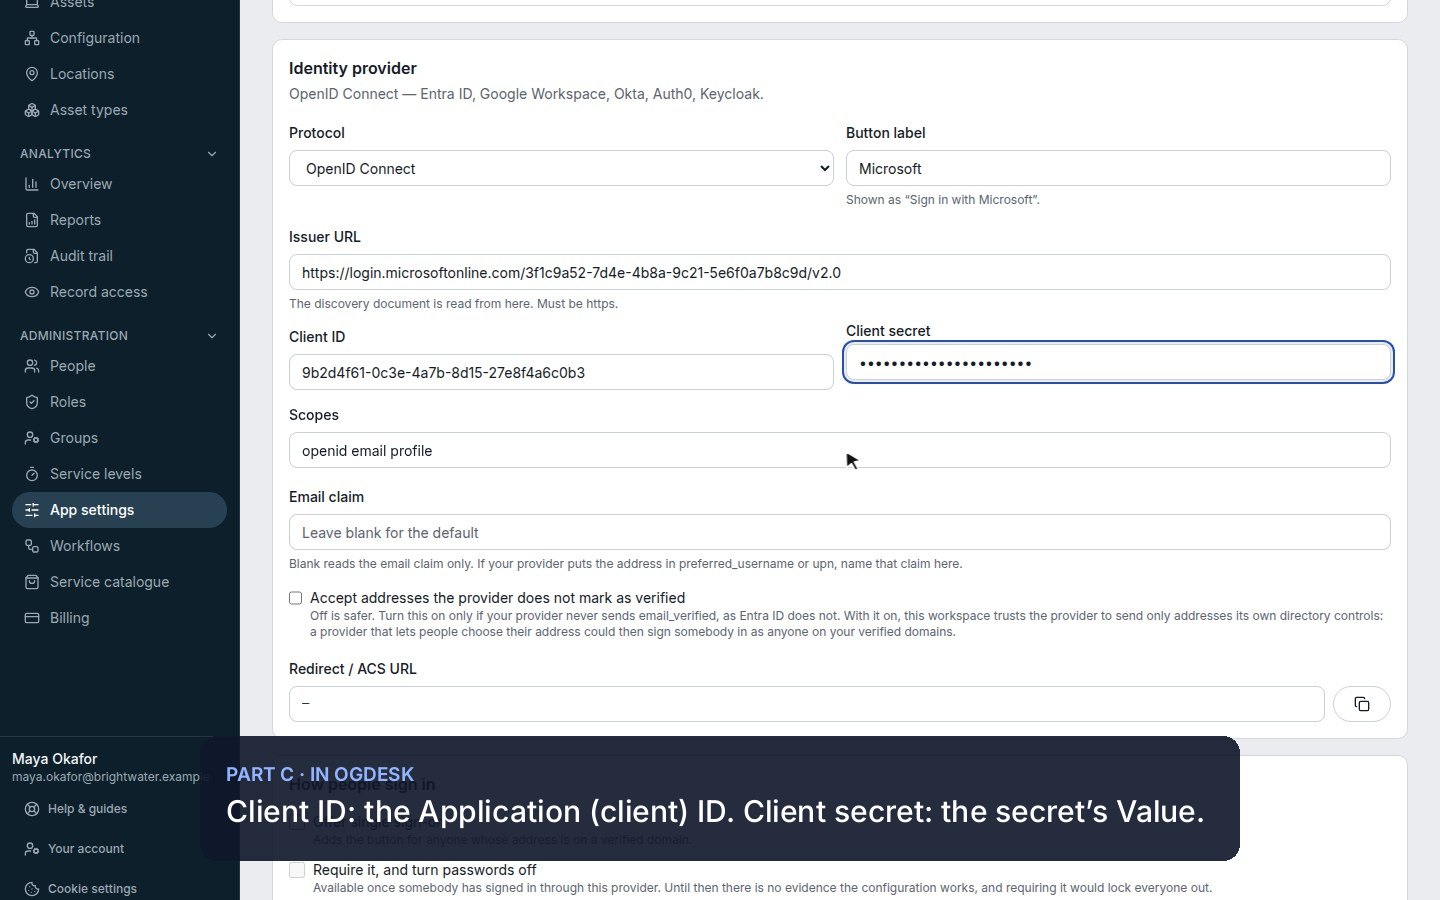
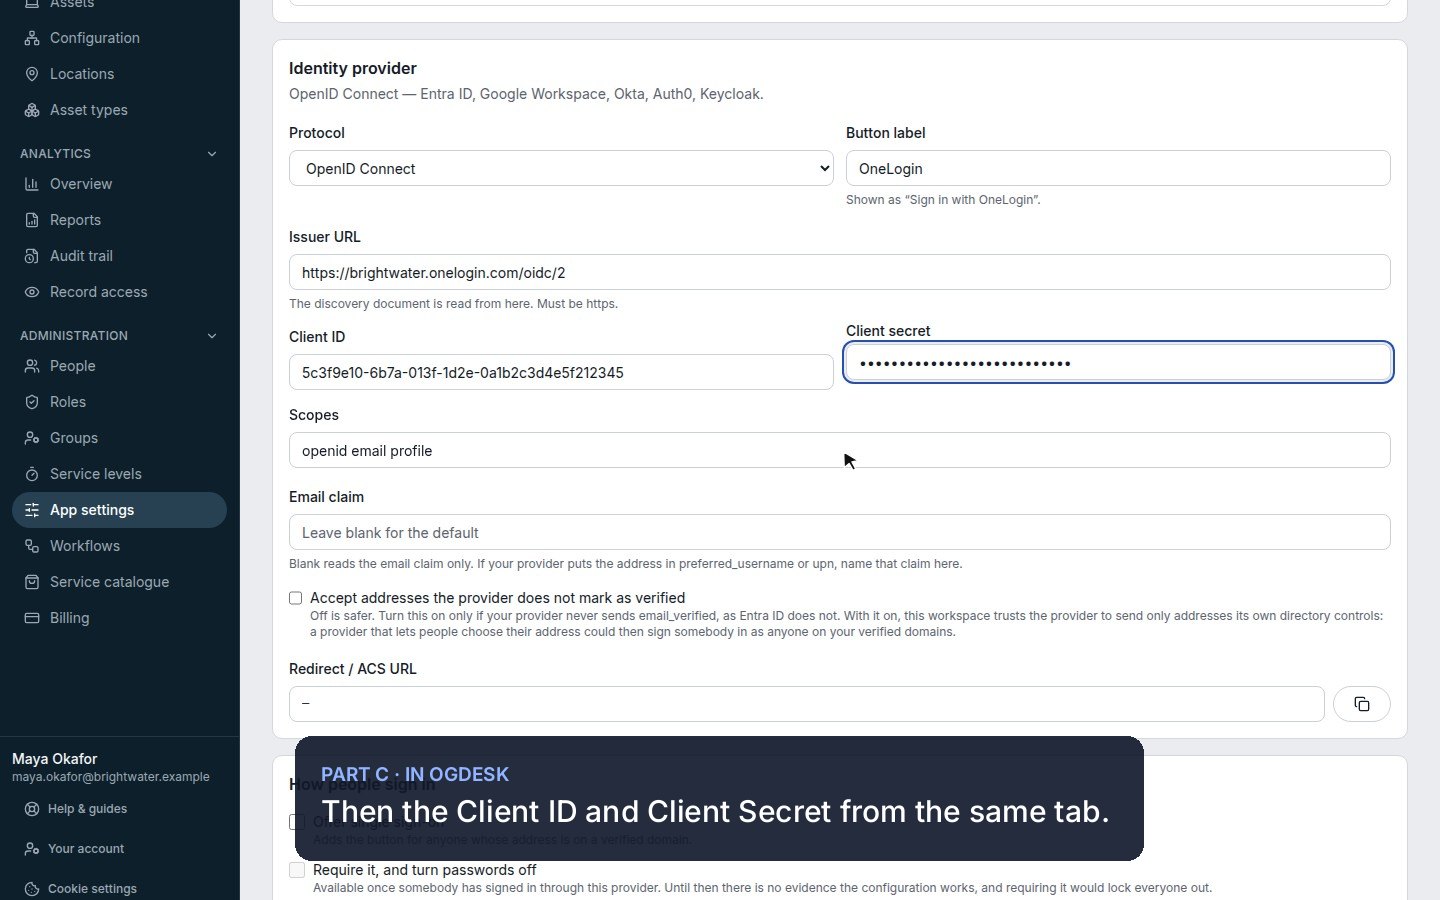
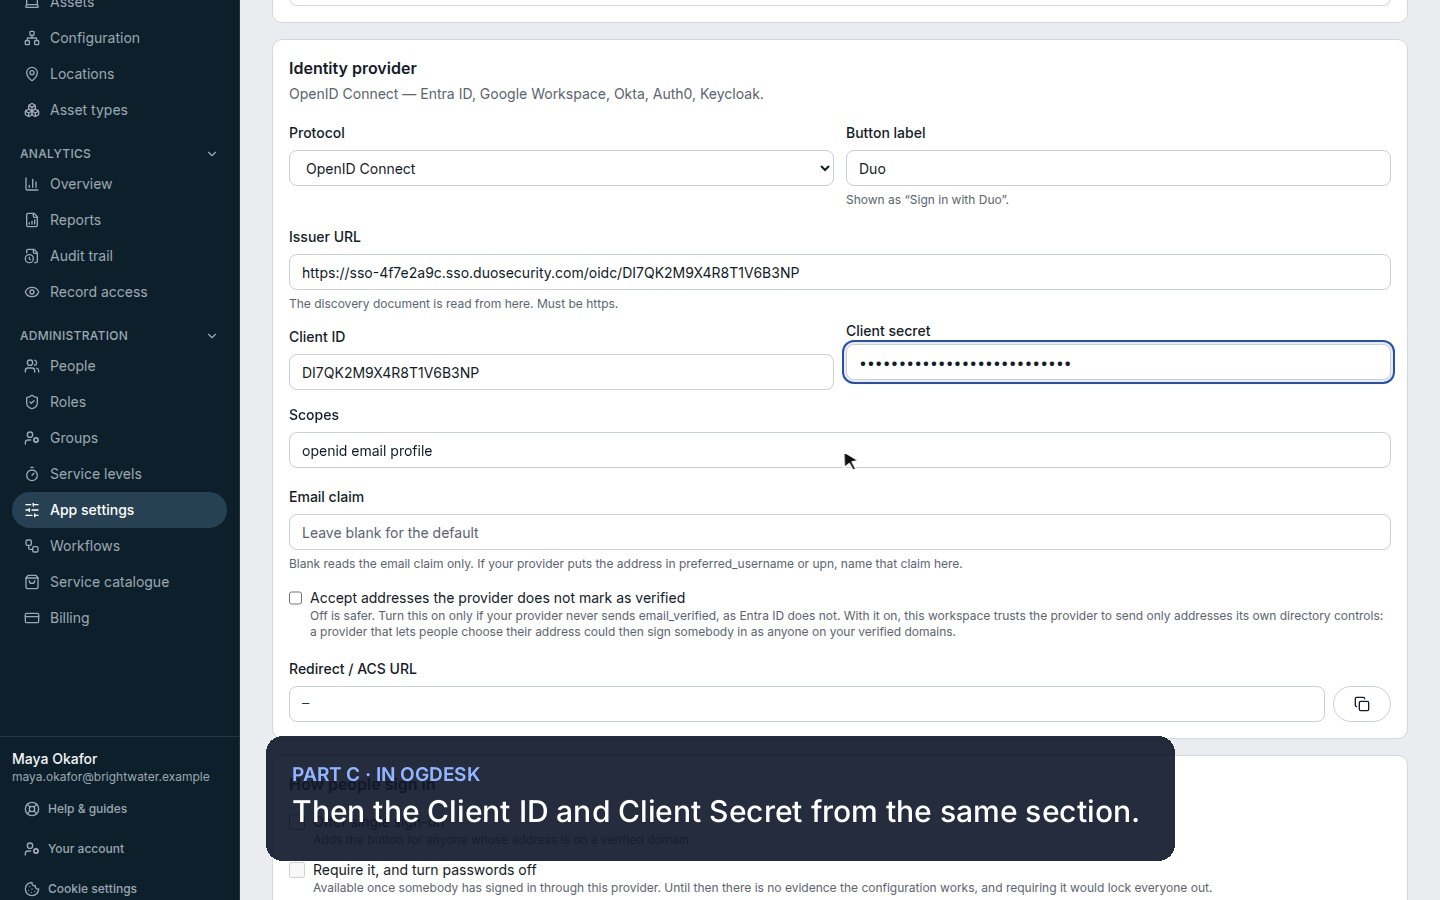
For any other provider, this guide covers the steps:
| Step | Where | What you do |
|---|---|---|
| 1 | OGDESK | Claim your email domain and prove you control it with a DNS TXT record. |
| 2 | Your identity provider | Register OGDESK as an application, using the addresses OGDESK shows you. |
| 3 | OGDESK | Enter your identity provider’s details and save. |
| 4 | OGDESK | Turn on Offer single sign-on and sign in once to test it. |
| 5 | OGDESK (optional) | Require single sign-on and turn passwords off. |
Before you start
- The Tenant Administrator role. A Help Desk Administrator can look at these settings but not change them.
- Administrator access to your identity provider, to register an application.
- Access to your domain’s DNS, to publish a TXT record.
- An OGDESK account of your own on the domain you will verify, so you can test the sign-in yourself.
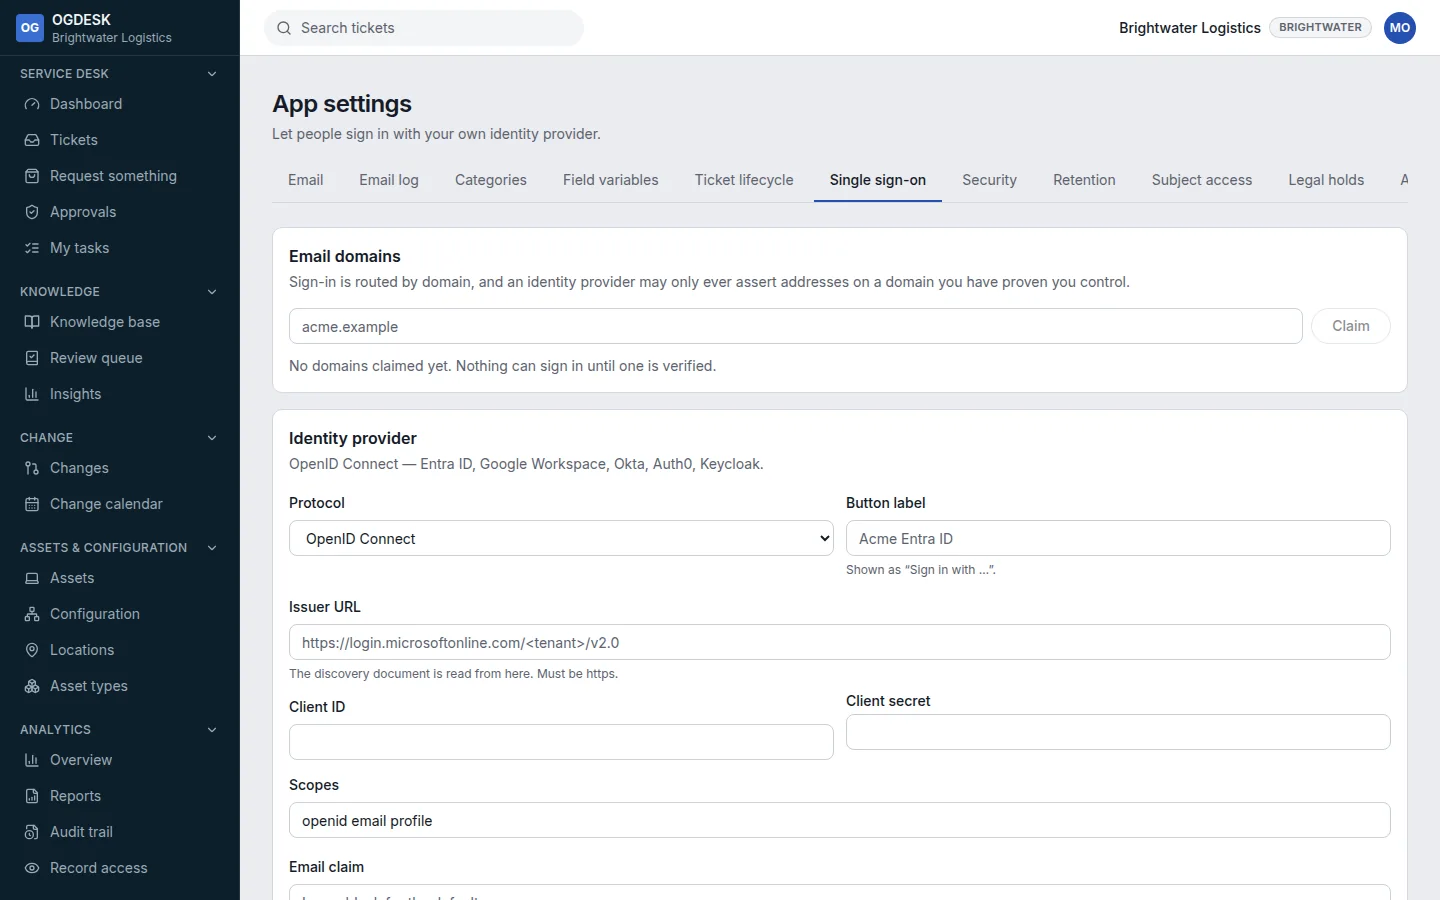
Everything is on one page: Administration → App settings → Single sign-on. It has three sections, Email domains, Identity provider and How people sign in, and this guide follows them in order.
Step 1 — Claim and verify your email domain
OGDESK decides which identity provider to offer from the domain of the email address somebody types, and only accepts a sign-in for an address on a domain your workspace has proven it controls.
Step 1: Under Email domains, type your domain, for example
acme.com, and choose Claim.Step 2: The domain appears as Unverified, with a TXT record to publish. Copy its Host and Value with the copy buttons.
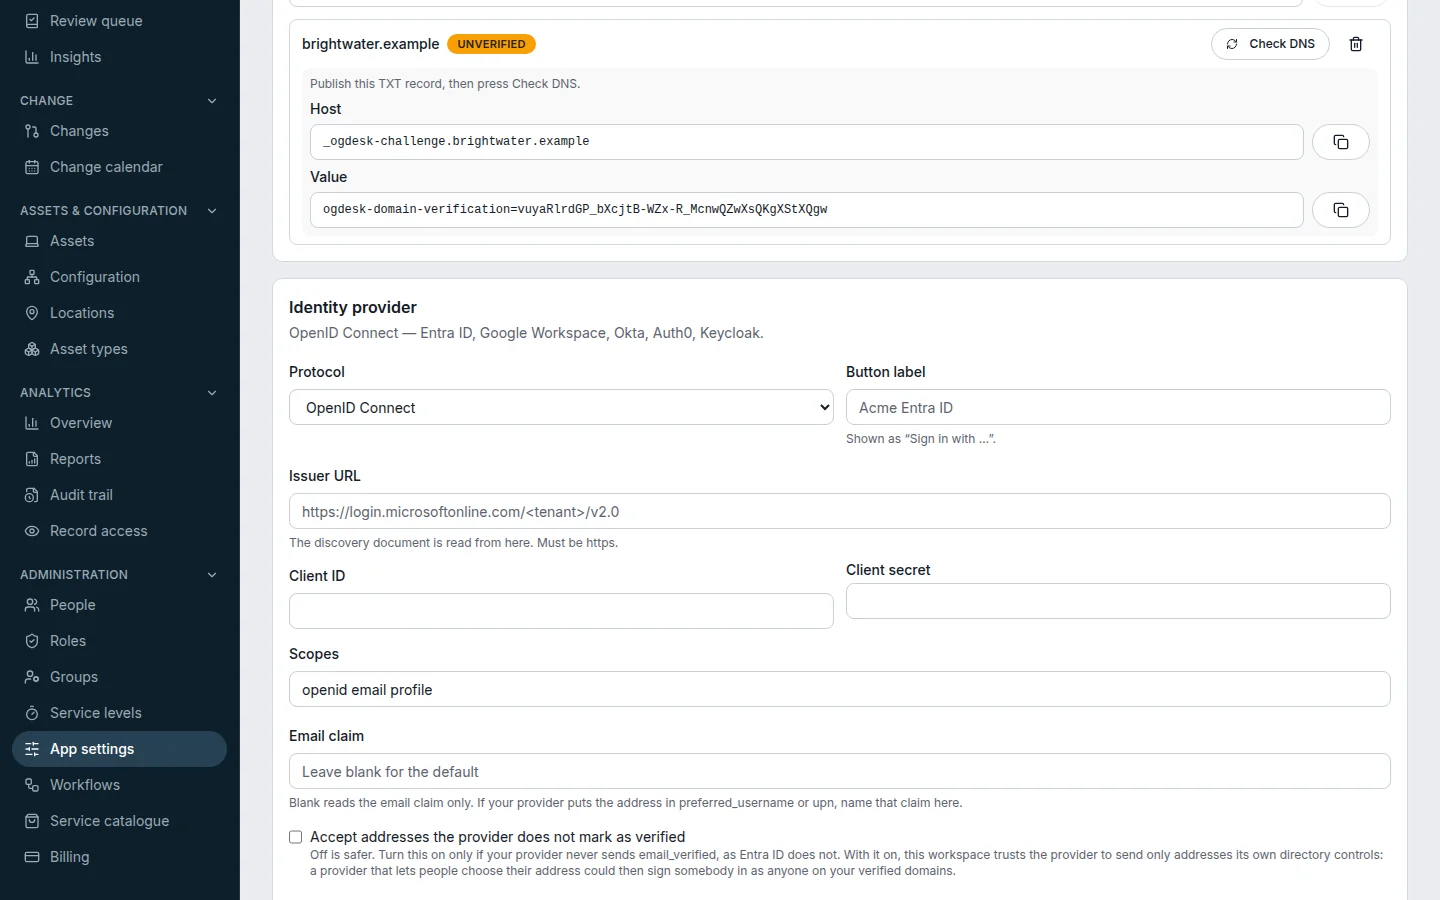
Step 3: At your DNS provider, create a TXT record with exactly that host and value.
The host looks like
_ogdesk-challenge.acme.comand the value likeogdesk-domain-verification=…. Copy the value from the page; it is unique to your workspace.Step 4: Back in OGDESK, choose Check DNS. Once the record is found, the badge changes to Verified.
DNS changes can take a while to spread. If no record is found yet, wait a few minutes and try again.
- Each domain is verified separately. Verifying
acme.comdoes not covereu.acme.com. - Public mailbox domains such as gmail.com or outlook.com cannot be claimed.
- Single sign-on cannot be switched on until at least one domain is verified.
Step 2 — Register OGDESK in your identity provider
Under Identity provider, choose the Protocol and type a Button label (people see it as “Sign in with …”). Then save with Enable single sign-on. Once it is saved, the read-only rows at the bottom of the section show the addresses your identity provider needs. Until then they show “—”.
| Protocol | In your identity provider | Value (copy it from the page) |
|---|---|---|
| OpenID Connect | Redirect URI (or callback URL) | Redirect / ACS URL, for example https://www.ogdesk.com/api/v1/auth/sso/callback/oidc |
| OpenID Connect | Scopes | openid email profile |
| SAML 2.0 | Assertion Consumer Service (ACS) URL, HTTP-POST binding | Redirect / ACS URL, for example https://www.ogdesk.com/api/v1/auth/sso/callback/saml |
| SAML 2.0 | Entity ID, audience or identifier | Our entity ID, for example https://www.ogdesk.com/sp |
| SAML 2.0 | NameID format | Email address: urn:oasis:names:tc:SAML:1.1:nameid-format:emailAddress |
| Provider | What to do there |
|---|---|
| Microsoft Entra ID | Under App registrations, register a web application, add the redirect URI and create a client secret. The issuer URL is https://login.microsoftonline.com/<tenant id>/v2.0. Entra does not say whether an address is verified, so tick Accept addresses the provider does not mark as verified in step 3. See the step-by-step Microsoft Entra ID guide. |
| Duo | Add a Generic OIDC Relying Party, put the redirect URI under Sign-In Redirect URLs, tick the email scope, and grant User access. The issuer URL is on its Metadata section. See the step-by-step Duo guide. |
| Google Workspace | In Google Cloud, create an OAuth client ID of type Web application and add the redirect URI. The issuer URL is https://accounts.google.com. |
| Okta | Create an OIDC Web Application integration and add the redirect URI as a sign-in redirect URI. The issuer URL is your Okta org URL, or your authorization server’s issuer, such as https://<your-org>.okta.com/oauth2/default. |
| OneLogin | Add an OpenId Connect (OIDC) app, put the redirect URI under Redirect URI's, and give the app to people. The issuer URL ends in /oidc/2. See the step-by-step OneLogin guide. |
| Other OpenID Connect | Any provider that publishes a discovery document at <issuer>/.well-known/openid-configuration, such as Auth0 or Keycloak. |
| SAML (ADFS and others) | OGDESK does not publish a metadata file, so enter the values above by hand. Sign both the response and the assertion; either one unsigned is refused. Send the address as an email or mail attribute, or as the NameID. |
Step 3 — Enter your provider’s details in OGDESK
Step 1: For OpenID Connect, fill in the Issuer URL, Client ID and Client secret from the application you registered. Leave Scopes as
openid email profile.The secret is stored encrypted and never shown again; once saved, the field reads “•••••••• (unchanged)”. Tick Accept addresses the provider does not mark as verified only for a provider such as Entra ID, whose directory controls people’s addresses.
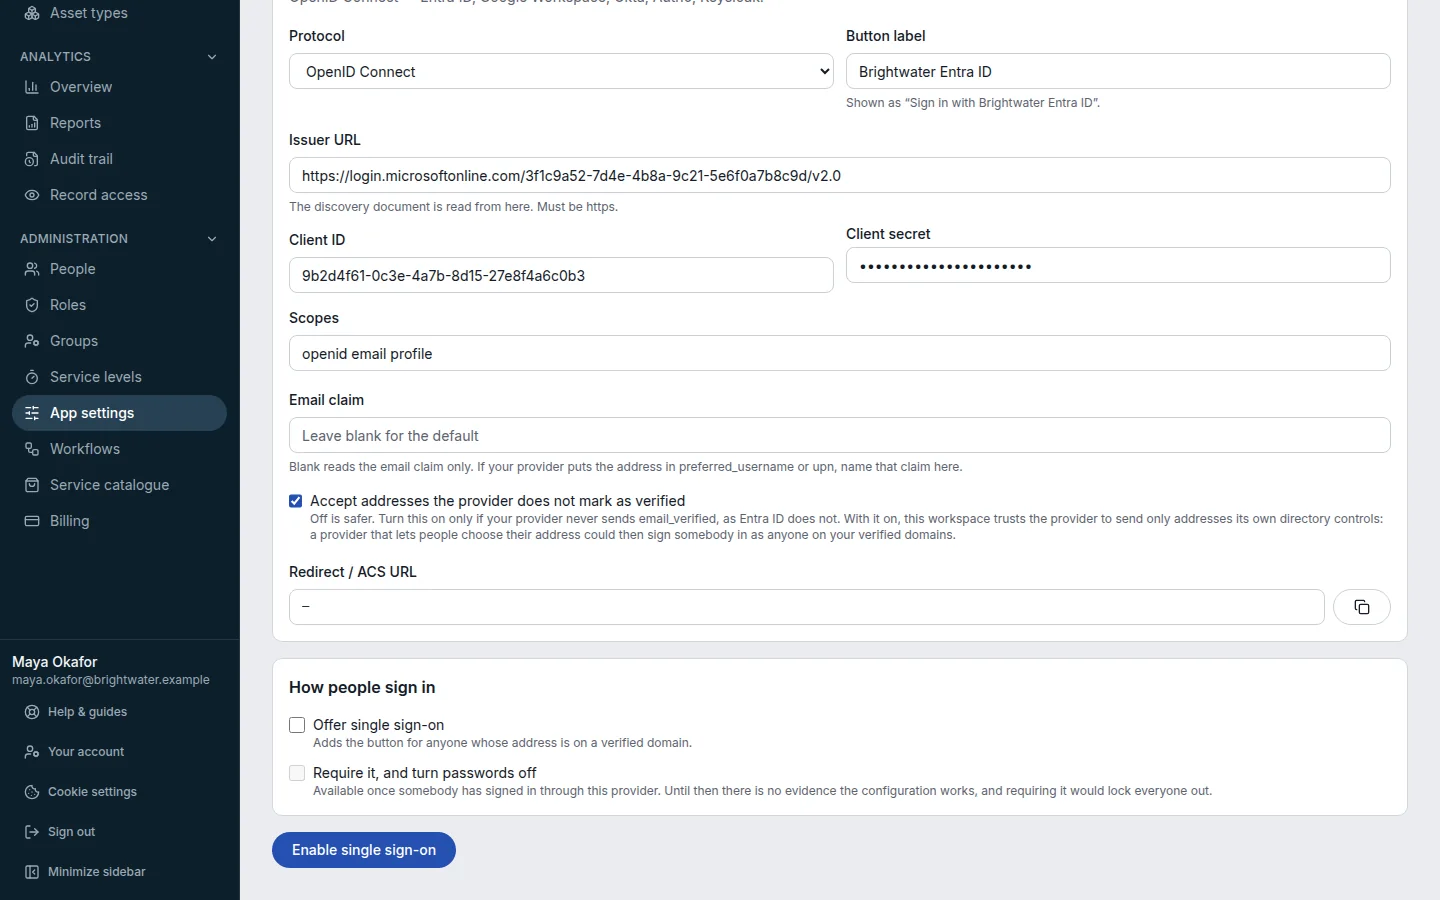
Step 2: For SAML 2.0, fill in the Sign-on URL, the IdP entity ID, the NameID format and the provider’s Signing certificate in PEM format (it starts
-----BEGIN CERTIFICATE-----).Leave Accept sign-ins started at the identity provider off, and start sign-in from the OGDESK sign-in page.
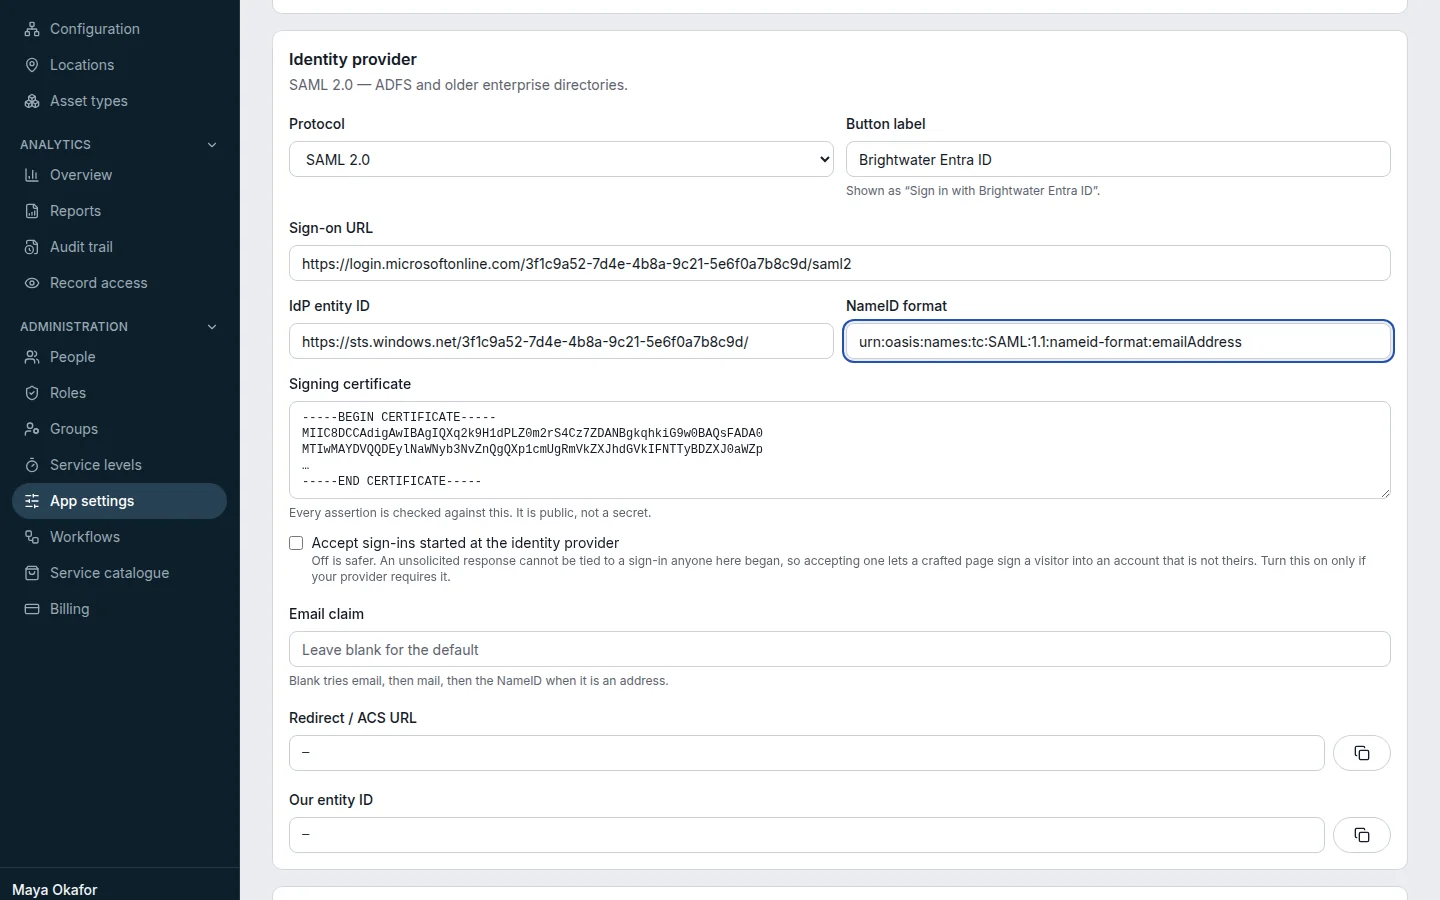
Step 3: Leave Email claim blank unless your provider sends the address somewhere unusual, for example in
preferred_usernameorupn.Step 4: Choose Enable single sign-on (or Save changes when you edit it later).
Step 4 — Turn it on and test it
Step 1: Under How people sign in, tick Offer single sign-on and save. People whose address is on a verified domain now see a sign-in button for your provider.
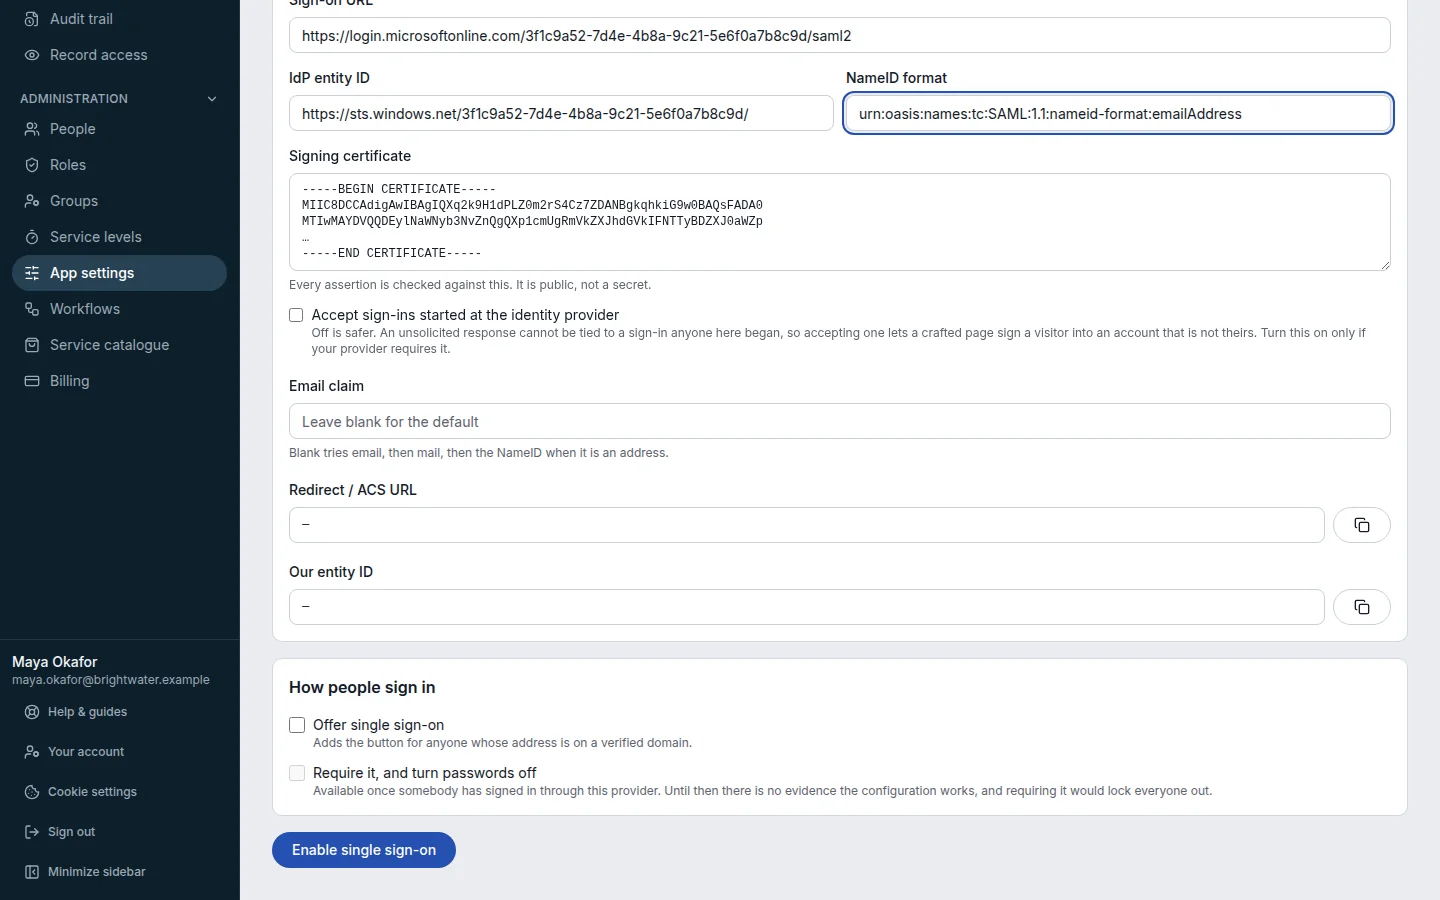
Step 2: Open a private browser window, go to the OGDESK sign-in page, type your work email and choose Continue. A Sign in with … button appears.
Step 3: Choose it, sign in at your identity provider, and you land back in OGDESK, signed in.
Step 4: Back on the Single sign-on tab, Last successful sign-in shows the time you just signed in. If it failed, Last attempt shows why, in red.
Step 5 — Require single sign-on (optional)
Once it works, tick Require it, and turn passwords off and save. The option stays unavailable until somebody has signed in through your provider successfully, because until then nothing shows the setup works.
- The sign-in page then shows only the single sign-on button for addresses on your verified domains.
- Password sessions that are already open stop renewing, so everybody is on single sign-on within about 15 minutes.
- It applies to everybody in this workspace, administrators included.
Managing people with single sign-on
- Invite people first. Somebody who is not a member sees “That account is not a member of this workspace.” An invited person can accept by signing in with single sign-on, without choosing a password.
- Everybody’s address must be on a verified domain. Verify every domain your people use.
- Removing somebody takes two steps: disable them at your identity provider, and remove them in OGDESK.
If something goes wrong
People see a short message; the full reason is on the Single sign-on tab, next to Last attempt. Check there first.
| Message | What to do |
|---|---|
| Single sign-on is not available for that domain. | The domain is not verified, or Offer single sign-on is off. |
| Your identity provider sent an address this workspace has not verified. | The address is on another domain or a subdomain. Verify it too, or fix the address the provider sends. |
| Your identity provider did not send an email address. | Add an email claim or attribute at the provider, or name the right one in Email claim. |
| Your identity provider did not say whether it has verified your email address… | Typical of Entra ID. Tick Accept addresses the provider does not mark as verified. |
| That account is not a member of this workspace… | Invite the person first. |
| That sign-in link has expired or has already been used. | The sign-in took more than ten minutes, or the page was reloaded. Start again from the sign-in page. |
| Audience … / Destination … (SAML) | The entity ID or ACS URL at the provider does not match Our entity ID or Redirect / ACS URL. |
| The assertion is not valid yet / has expired (SAML) | The provider’s clock is more than 60 seconds out. |
| No TXT record found at … | The DNS record is missing, not yet published, or has the wrong host or value. Compare it with the page. |
Every change to the provider and every domain claimed, verified or released is recorded in the audit trail.